

 Español
 中文简体
中文简体 عربى
عربى- 1 Step 1: Preparation of the Living Room Wall Substrate
- 2 Step 2: Selecting Suitable PVC Wall Panels for the Living Room
- 3 Step 3: Installation Process – Five Sub‑Steps
- 3.1 3.1 Fixing the first panel and ensuring correct alignment
- 3.2 3.2 Interlocking or adhesive methods: comparison table
- 3.3 3.3 Cutting and fitting around openings (windows, sockets, TV mount)
- 3.4 3.4 Sealing joints and applying finishing trims
- 3.5 3.5 Checking for acoustic and waterproof integrity, especially relevant for living room usage
- 4 Step 4: Finishing Up & Quality Check
- 5 Step 5: Common Pitfalls to Avoid in DIY Installation of PVC Wall Panels for Living Room
- 5.1 5.1 Pitfall 1: Ignoring substrate irregularities
- 5.2 5.2 Pitfall 2: Choosing low‑quality panels without checking specs
- 5.3 5.3 Pitfall 3: Incorrect measurement and cutting leading to wasted material
- 5.4 5.4 Pitfall 4: Improper joint or trim installation that shows gaps or misalignment
- 5.5 5.5 Pitfall 5: Failing to account for acoustics or waterproofing in a living room setting
- 6 Comparison Table of Key Choices
- 7 Company Background – Why Choose Our Factory‑Made Composite Wall Solutions
- 8 Conclusion
- 9 FAQ
When it comes to refreshing your living space, installing PVC Wall panels for living room offers an efficient and stylish solution. Whether you are looking at a full‐wall makeover or a feature accent, understanding each step from preparation through finishing is key. In this article we'll walk through the DIY process, highlight how to incorporate specifications like moisture resistance or acoustic performance, and share a clear checklist of common mistakes to avoid. We also introduce our company's background so you can feel confident about product origins and technical support.
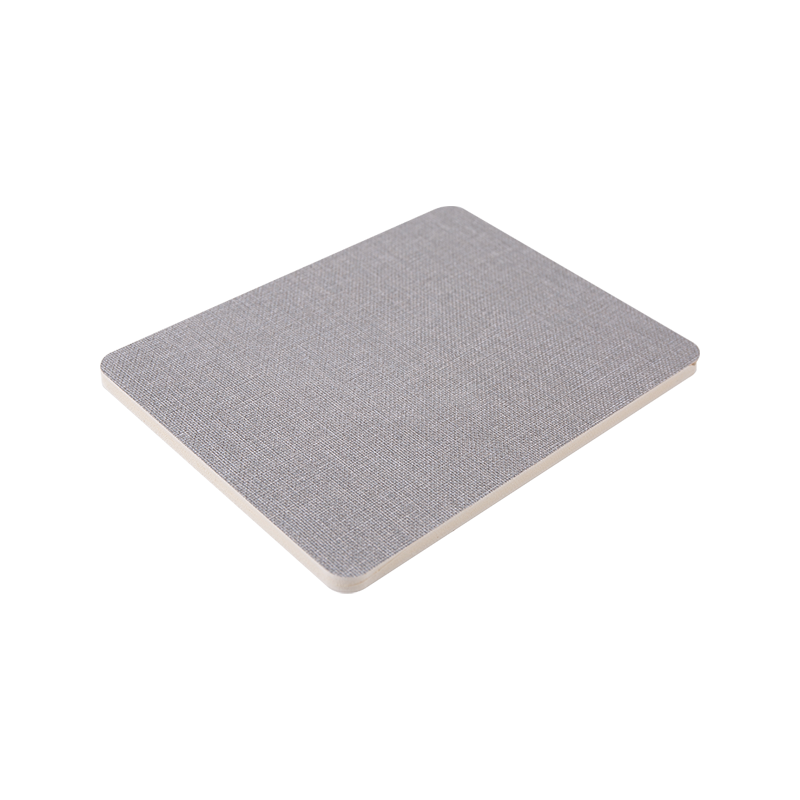
8mm PVC Foam Wood Veneer Wall Panel - Fabric Series
Step 1: Preparation of the Living Room Wall Substrate
1.1 Clear and clean the substrate
- Remove furniture from the wall area, detach wall decorations or fixtures.
- Clean the wall surface: dust, old paint flaking, grease or residue must be removed.
1.2 Check for level and fix any irregularities
- Use a spirit‑level or laser level to check flatness; any bumps or depressions > 5 mm should be addressed.
- Patching compound or drywall repair may be required before paneling.
1.3 Measure and mark layout for your feature wall
- Decide whether you are covering the full living room wall or creating a focal accent zone.
- Mark vertical and horizontal lines to guide panel alignment and ensure symmetry with furniture layout (for example behind sofa or TV).
Step 2: Selecting Suitable PVC Wall Panels for the Living Room
2.1 Consider waterproof and acoustic performance for living room walls – comparing options
As you plan to install PVC Wall panels for living room, certain technical features matter more than typical decorative wall coverings. For example, waterproof panels make maintenance easier and avoid damage from accidental spills. Acoustic‐enhanced panels help reduce ambient noise in open‑plan living spaces.
Choosing a budget option may save cost but if the panel lacks certain specifications you may have to replace sooner. A premium panel may offer longer lifespan or better finish. Below is a comparison:
| Criteria | Budget Panels | Premium Panels |
| Material thickness | ~8‑10 mm | ~12‑15 mm or more |
| Water resistance rating | Basic splash protection | Full waterproof core + sealed edges |
| Acoustic reduction | Minimal or none | Built‑in backing or interlocking design for noise control |
| Finish variety and durability | Standard colours, fewer options | Wide range of textures & finishes, UV‑stable surface |
2.3 Eco‐friendly material choices and what they mean for indoor air quality
- If you prioritise indoor health and are searching for eco‑friendly PVC wall panels living room design, look for certifications, low‑VOC adhesives, and stable PVC formulas.
- Ensure that any accessories (trim, adhesive, fasteners) match the eco standard of the panels to avoid off‑gassing.
Step 3: Installation Process – Five Sub‑Steps
3.1 Fixing the first panel and ensuring correct alignment
- Begin from one side of the wall (often a corner) and use a level to ensure the first panel is plumb – misalignment here propagates errors across the wall.
- Apply adhesive or mechanical fixings as recommended by the panel manufacturer.
3.2 Interlocking or adhesive methods: comparison table
When installing DIY DIY PVC wall panels living room installation, you'll typically choose between interlocking systems (tongue‑and‑groove) or adhesive/fixed methods. Here's a comparison:
| Method | Interlocking System | Adhesive/Fixings |
| Ease of installation | Quick to click together | Requires careful application of adhesive or fasteners |
| Repair/Replacement | Easier to remove individual panels | May damage substrate when removed |
| Cost | Slightly higher per panel cost | Lower panel cost but may need more finishing |
| Finish quality | Cleaner joints if aligned well | Depends on adhesive and trim precision |
3.3 Cutting and fitting around openings (windows, sockets, TV mount)
- Measure each opening carefully and mark panel accordingly before cutting—use a fine‑tooth saw or laminate cutter to avoid chipping.
- Ensure flush fit with trim or reveal to maintain a professional finish.
3.4 Sealing joints and applying finishing trims
- Use matching trims (corners, edge strips) to hide panel ends and create a neat border.
- Seal the joints if you selected a waterproof panel system—this step ensures functional performance and aesthetic continuity.
3.5 Checking for acoustic and waterproof integrity, especially relevant for living room usage
- After installation, test by lightly pressing or tapping various areas to listen for hollow sound which may indicate insufficient fixings.
- Wipe down the surface and monitor any seams or edges for gaps where dust or moisture could accumulate.
Step 4: Finishing Up & Quality Check
4.1 Cleaning and protecting the installed wall panel surface
- Remove any construction dust; use a damp microfiber cloth (non‐abrasive) to wipe the panel surface.
- Avoid harsh chemical cleaners – choose pH‑neutral cleaning products suitable for PVC surfaces.
4.2 Lighting and furniture placement considerations for panel feature wall
- Ensure that furniture (sofa, TV unit) is placed at appropriate distance to avoid bumping the panel surface.
- Consider LED strip or wall‑washer lighting to emphasise texture if the panels have 3D or relief finish.
4.3 Long‐term maintenance tips and what to inspect periodically
- Check for any loose panels around the joins every 12 months.
- Inspect the trim and joints especially if near windows or high‑traffic zones; re‑seal if gaps appear.
Step 5: Common Pitfalls to Avoid in DIY Installation of PVC Wall Panels for Living Room
5.1 Pitfall 1: Ignoring substrate irregularities
- Failing to flatten or repair the wall substrate leads to visible bulges or panel separation later.
5.2 Pitfall 2: Choosing low‑quality panels without checking specs
- Panels lacking sufficient waterproofing or acoustic backing may degrade sooner or under‑perform, especially in living rooms near open spaces.
5.3 Pitfall 3: Incorrect measurement and cutting leading to wasted material
- Make sure you include allowances for trim and expansion gaps; mis‑measuring can result in off‑cuts or gaps.
5.4 Pitfall 4: Improper joint or trim installation that shows gaps or misalignment
- Joints mis‑aligned or poorly sealed will attract dust, look unprofessional, and possibly allow moisture ingress.
5.5 Pitfall 5: Failing to account for acoustics or waterproofing in a living room setting
- Many DIY installers choose decorative panels but overlook functional extras—this means a wall that looks good but lacks performance. If you are after acoustic PVC wall panels living room soundproofing, ensure the products deliver on that.
Comparison Table of Key Choices
| Feature | Standard Decorative Panel | Performance‑Enhanced Panel |
| Waterproof Core | No | Yes |
| Acoustic Backing | No | Yes |
| Eco Certification | Optional | Certified Low‑VOC |
| DIY Friendliness | Moderate | High (Designed for DIY) |
Company Background – Why Choose Our Factory‑Made Composite Wall Solutions
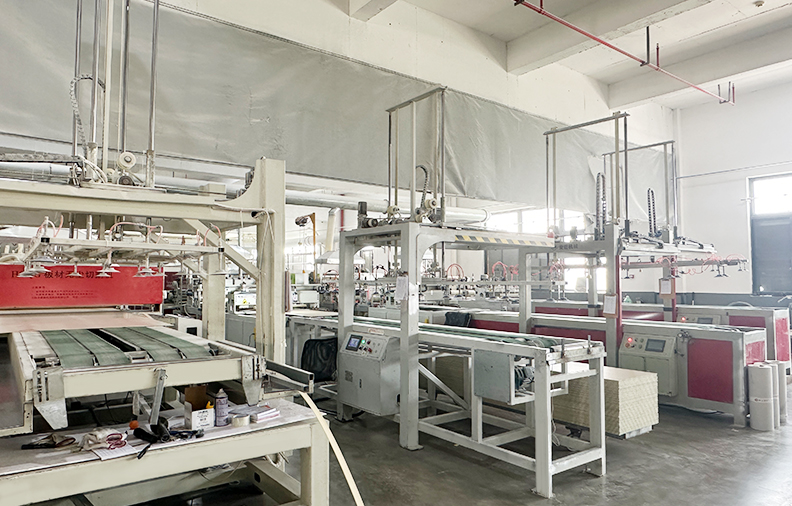
Haining Jiazhimeng Integrated Home Co., Ltd. is a factory enterprise with independent research and development capability, located in Haining City, Jiaxing, Zhejiang Province, China. We focus on the production of composite materials, mainly producing WPC wallboard, bamboo wood fiberboard, wood veneer, and other wall products. The company entered the field of interior decoration materials in 2006, began to develop WPC materials in 2013, and across the entire field of wallboard has 17 years of experience. We have advanced production equipment and technology and are committed to research and development and updating our products, in order to provide customers with good quality. We mainly export to Southeast Asia, Australia, the Middle East, South America, etc., providing customised services and good products for our partners, to achieve win‑win results with our partners.
Our services cover not only independent production of all kinds of wall products, but also establishing cooperative relationships with manufacturers of supporting products required for wall panels, such as lines, lamp strips, etc. We are committed to providing customers with convenience, worry‐free, quality service so that customers can buy the products they need in one place.
Conclusion
Installing PVC Wall panels for living room yourself can transform your living space into a stylish, durable, and functional feature wall — especially when you follow the right five steps: preparation, selection, installation, finishing, and avoiding pitfalls. By choosing suitable panels (for example those designed for waterproof PVC wall panels living room feature wall or budget PVC wall panels living room makeover projects), and by installing them carefully, you ensure both appearance and performance. With the backing of an experienced manufacturer with 17 years in wallboard production, you can trust product quality and support. Start your DIY project with confidence — and enjoy your refreshed living room.
FAQ
- Q1: How long does a DIY installation of PVC wall panels for living room typically take?
A1: It depends on wall size and complexity (open wall with few obstacles may take 1‑2 days; multiple openings/sockets may take longer). - Q2: Can I install PVC wall panels over existing painted drywall in the living room?
A2: Yes — provided the substrate is cleaned, levelled, and primed if needed. The first step emphasises this preparation. - Q3: Are panels marketed as eco‑friendly PVC wall panels living room design really better for indoor air quality?
A3: They can be — look for low‑VOC adhesives, certified PVC material, sealed trims; these reduce off‑gassing and promote healthier interiors. - Q4: How do I ensure good acoustic performance with PVC wall panels in living room sound‑sensitive spaces?
A4: Choose panels with built‑in acoustic backing, install tightly with correct fixings, seal all joints and consider supplementary soft furnishings. - Q5: What maintenance is required after installing PVC wall panels for living room use?
A5: Regular dusting or wipe with damp cloth, annual check of joints/trims for gaps, and avoid exposing panels to direct high heat or sharp impact.


 Tel:
Tel:
 E-mail:

