

 Español
 中文简体
中文简体 عربى
عربىArticle Directory
- 1 Why are WPC Wall Panels Highly Regarded for Their Easy Installation?
- 2 Essential Preparations Before Installation
- 3 Step-by-Step Guide: Easily Mastering WPC Wall Panel Installation
- 4 Expert Advice for Enhancing Efficiency and Saving Costs
- 5 FAQ
- 5.1 Can WPC Wall Panels Be Installed Directly Over Tiles?
- 5.2 Is an Expansion Gap Necessary When Installing WPC Wall Panels?
- 5.3 What are the Main Installation Differences Between WPC, Traditional PVC, and Solid Wood Wall Panels?
- 5.4 Can WPC Wall Panels Be Installed in High-Humidity Areas Like Bathrooms or Kitchens?
In the realm of modern Interior Home Decoration, WPC Louvers Wall Panels (Wood-Plastic Composite Louvers Wall Panels) have rapidly become a favorite among designers and homeowners due to their unique texture, eco-friendly properties, and exceptional durability. However, one of their greatest advantages is the simplified installation process, enabling both DIY enthusiasts and professional installers to complete projects efficiently. This article provides a comprehensive diy wpc wall panels step by step guide, delving into every detail from preparation to final touches, aiming to help you achieve a seamless and professional-looking installation while sharing crucial wpc wall panel installation cost saving tips.
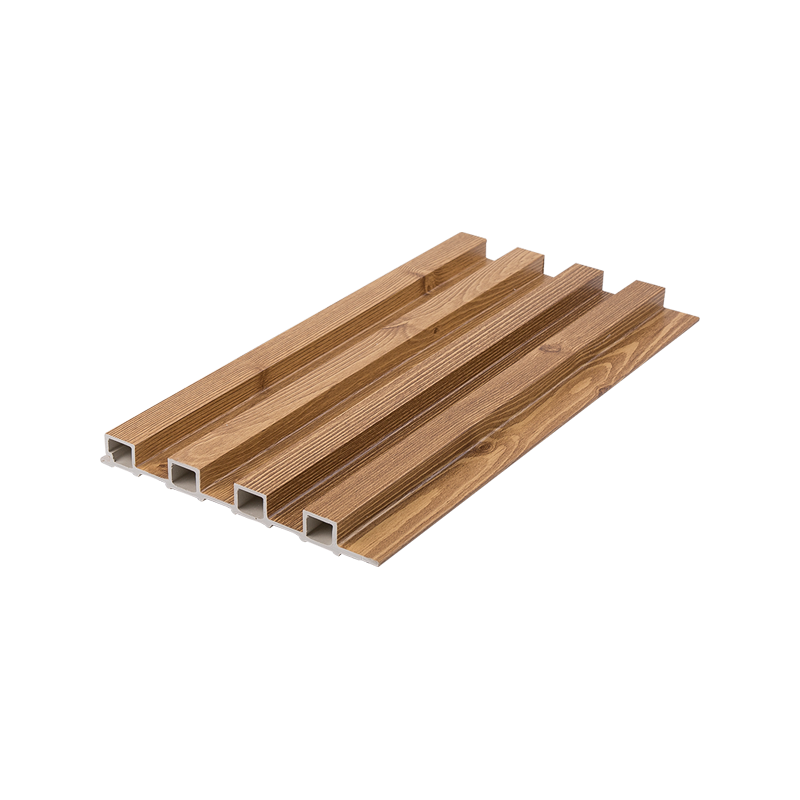
150*17mm WPC Louvers Wall Panel Decoration Material
Why are WPC Wall Panels Highly Regarded for Their Easy Installation?
Compared to traditional solid wood or stone wall materials, WPC (Wood-Plastic Composite) wall panels are designed with installation convenience in mind from the outset. Their unique tongue-and-groove or click-lock connection systems greatly simplify the joining process, often requiring no highly specialized tools or skills. Furthermore, WPC material is relatively lightweight, making it easy for a single person to handle and secure, which further reduces construction time. For homeowners looking to complete a home renovation over a weekend, mastering techniques like how to install wpc wall panels on uneven walls means achieving satisfactory decorative results even on imperfect substrate walls.
- Integrated Design: Many WPC wall panels incorporate hidden fastener systems, creating a clean, seamless visual effect.
- Workability: WPC material is easy to cut and shape, facilitating work around window/door edges and corners.
- Dimensional Stability: Very low thermal expansion and contraction rates ensure the panels won't warp or buckle significantly after installation due to seasonal changes.
Essential Preparations Before Installation
Thorough preparation is key to the success of any Interior Home Decoration project. Skipping this step can lead to various issues mid-installation, increasing both time and cost.
Tool Checklist: Ensuring a Smooth Installation Process
Having a complete wpc louver panels installation tools list is the first step to efficient work. The right tools not only improve installation accuracy but also ensure safety.
- Laser Level or Plumb Bob: For ensuring the first panel is perfectly vertical.
- Handheld Circular Saw or Table Saw: For making precise cuts to the required panel lengths.
- Rubber Mallet: For gently tapping panels into place for a tight fit without damaging the surface.
- Pneumatic Nail Gun or Heavy-Duty Stapler: Suitable for the batten installation method.
- Tape Measure, Pencil, and Speed Square: For measuring and marking.
- Personal Protective Equipment (PPE): Including safety glasses and gloves.
Wall Surface Preparation: Laying the Foundation for a Perfect Installation
The flatness and dryness of the wall surface directly impact the final installation quality and aesthetics. Even solutions designed for how to install wpc wall panels on uneven walls require proper substrate preparation.
- Cleaning and Drying: Ensure the wall is free of dust, grease, and any loose material. The wall must be completely dry to prevent moisture entrapment.
- Leveling: If the wall has significant irregularities (depressions or protrusions exceeding 5mm), it's advisable to use self-leveling compound or install wooden/vertical battens to create a flat surface.
- Vapor Barrier: In damp areas (like bathrooms), consider installing a vapor barrier membrane on the wall for added protection.
Step-by-Step Guide: Easily Mastering WPC Wall Panel Installation
Following a clear diy wpc wall panels step by step process minimizes errors and ensures the installation progresses smoothly.
How to Start and Secure the First Panel
Starting correctly is crucial. The positioning and securing of the first panel determine the flatness and vertical alignment of the entire wall surface.
- Use a laser level to draw a vertical reference line on the wall.
- Align the edge of the first panel with this reference line. It's generally recommended to start from a corner or the most prominent side of the room.
- Depending on your chosen installation method (direct adhesive or batten/furring strip), use the appropriate best adhesive for wpc wall panels or mechanical fasteners for the initial fix. Ensure it is secure and perfectly vertical.
Sequential Installation and Panel Connection Techniques
Once the first panel is secured, subsequent installation becomes rapid and systematic.
- Align the tongue (male end) of the second panel with the groove (female end) of the first panel and insert it at an angle.
- Use a rubber mallet to gently tap the edge of the panel, ensuring the locking mechanism engages fully and the joint is tight.
- Periodically check the overall flatness and vertical alignment, making minor adjustments as needed.
Professional Methods for Handling Corners and Irregular Areas
Encountering windows, doors, electrical outlets, or internal/external corners requires specific techniques.
- Internal Corners: Precisely cut the edge of one panel at a 45-degree angle to meet the panel on the adjacent wall, or use a dedicated internal corner trim piece to cover the joint.
- External Corners: Similarly, use 45-degree angle cuts for a mitered joint, or use more durable external corner guard trims for protection.
- Cutting Openings: For power outlets, accurately measure and mark the location on the back of the panel, then use a jigsaw or hole saw to create the required opening.
Expert Advice for Enhancing Efficiency and Saving Costs
Mastering a few professional tips can not only speed up installation but also effectively control your budget, which is the core value of wpc wall panel installation cost saving tips.
Choosing the Right Adhesive and Fixing Method
Selecting the appropriate fixing method is crucial for long-term stability. For very flat and sound walls, using a high-quality best adhesive for wpc wall panels (such as polyurethane construction adhesive) can be a fast and non-invasive option. If the wall is uneven, installing wooden or metal battens and then screwing the panels to them is a more reliable method. The table below compares the two primary methods:
| Fixing Method | Suitable Wall Condition | Advantages | Disadvantages |
| Direct Adhesive | Very flat, solid walls | Fast installation, no visible fasteners | Requires extremely flat surface, difficult to remove later |
| Batten Installation | Uneven walls or where a cavity is needed | Allows for leveling, hides utilities, provides ventilation/moisture drainage | Slightly longer installation time, slightly reduces room space |
Planning the Layout to Avoid Material Waste
Careful layout planning is the most significant cost-saving measure.
- Before installation, perform a dry layout based on wall dimensions and panel sizes. Mix panels from different boxes to minimize color variation.
- Save longer off-cuts from cuts for use at the opposite end of the wall or in other small areas.
- For large projects, consider the custom sizing services offered by manufacturers like Haining Jiazhimeng Integrated Home Co., Ltd., as ordering specific lengths can virtually eliminate waste.
FAQ
Can WPC Wall Panels Be Installed Directly Over Tiles?
Yes, but this is an advanced application. Tile surfaces are smooth and require special preparation. Ensure all tiles are firmly attached and use coarse sandpaper to roughen the glazed surface of the tiles to improve adhesive bond. Most critically, you must choose a powerful adhesive suitable for both smooth, hard surfaces and WPC Louvers Wall Panels (e.g., certain high-performance epoxy or polyurethane adhesives). We more commonly recommend installing a leveling batten system over the tiles. This ensures flatness and creates a beneficial ventilation cavity, representing a more foolproof solution related to how to install wpc wall panels on uneven walls.
Is an Expansion Gap Necessary When Installing WPC Wall Panels?
Yes, this is a very important step. Although WPC material has a much lower expansion/contraction rate than solid wood, it can still undergo minor dimensional changes with fluctuations in temperature and humidity. During installation, leave a gap of approximately 3-5 mm between the panels and the ceiling, floor, and adjacent walls. This gap can later be concealed with color-matched scotia/trim, sealant, or skirting boards (baseboards), ensuring aesthetics while allowing for the material's natural movement.
What are the Main Installation Differences Between WPC, Traditional PVC, and Solid Wood Wall Panels?
The main differences stem from the inherent material properties. Compared to PVC wall panels, WPC Wall Panels are typically heavier and more rigid, thus requiring stronger fixings. Compared to solid wood panels, WPC installation is considerably simpler. Solid wood often requires more pre-treatment (e.g., preservative, insect repellent) and is highly sensitive to ambient humidity, potentially needing sanding and sealing/finishing after installation. WPC Wall Panels, however, come pre-finished with uniform color and texture, requiring no additional painting or sealing post-installation, greatly simplifying the diy wpc wall panels step by step process.
Can WPC Wall Panels Be Installed in High-Humidity Areas Like Bathrooms or Kitchens?
Absolutely. This is one of the key strengths of WPC wall panels. Their wood-plastic composite nature gives them excellent moisture resistance and low water absorption, making them resistant to mold and rot. For instance, the WPC wall panels produced by Haining Jiazhimeng Integrated Home Co., Ltd. undergo rigorous moisture resistance testing, making them highly suitable for bathrooms, kitchens, or balconies. To ensure optimal performance, we recommend: ensuring the substrate wall is dry, using high-quality mildew-resistant silicone sealant for joints, and maintaining good ventilation in the space. By following these steps, your WPC wall will remain in excellent condition for years, even in humid environments.


 Tel:
Tel:
 E-mail:

